Secure SSH Key Storage with EviKey NFC USB Drive | Advanced Encryption
Experience unparalleled secure SSH key storage with EviKey NFC USB. With advanced encryption, contactless NFC authentication, and programmable auto-lock, EviKey ensures your credentials remain safe from cyber threats. Moreover, discove and how EviKey enhances usability while keeping your digital assets safe with state-of-the-art features. how EviKey enhances usability while keeping your digital assets safe with state-of-the-art features.
2026 Tech Fixes Security Solutions
January 21, 2026
2026 Tech Fixes Security Solutions
January 19, 2026
2025 Digital Security Tech Fixes Security Solutions Technical News
October 10, 2025
2025 Tech Fixes Security Solutions
September 4, 2025
2025 Tech Fixes Security Solutions Technical News
August 25, 2025
2025 Tech Fixes Security Solutions
July 23, 2025
2025 Tech Fixes Security Solutions
July 16, 2025
2025 Tech Fixes Security Solutions
May 2, 2025
2024 Tech Fixes Security Solutions
November 10, 2024
2024 Tech Fixes Security Solutions
September 8, 2024
2023 EviKey & EviDisk EviKey NFC HSM NFC HSM technology Tech Fixes Security Solutions Technical News
September 16, 2023
In infrastructure cybersecurity ↑ this note belongs to the Tech Fixes & Security Solutions section and is part of Freemindtronic’s sovereign operational tooling (HSM, key segmentation, audit).
EviKey NFC USB: A Breakthrough in Secure SSH Key Storage
In the rapidly evolving cybersecurity landscape, secure SSH key storage has become a critical priority for organizations and individuals alike. The EviKey NFC USB drive combines NFC hardware-based security with advanced encryption and centralized key management options, offering unparalleled protection for your credentials. Unlike traditional methods, EviKey ensures your SSH keys remain secure from threats like brute force attacks, mismanagement, or secret sprawl. This guide explores how EviKey bridges the gap between usability and state-of-the-art security, empowering you to safeguard your digital assets effortlessly.
The Importance of Secure SSH Key Storage in Cybersecurity
SSH keys are fundamental to secure remote server access, but improper storage practices expose them to theft, misuse, and brute force attacks. Securing these credentials is a critical step in safeguarding digital assets and maintaining operational security.
Public Key Authentication: A Superior Alternative
SSH supports two authentication methods: passwords and public keys. However, while passwords are straightforward, they are vulnerable to brute force attacks and interception. By contrast, public key authentication, which pairs a private key stored securely with a public key shared on the server, provides a more robust, secure alternative.
Challenges in Managing SSH Keys
Despite its advantages, managing SSH keys introduces challenges:
- Key Management: Handling multiple keys for different systems, which can lead to secret sprawl if not addressed.
- Key Security: Ensuring secure SSH key storage to prevent loss or compromise.
- Recovery: Restoring keys if a device is lost or damaged. Effective secret sprawl management is crucial for organizations to minimize the risk of unauthorized access and streamline key usage.
EviKey NFC USB drive addresses these issues head-on.
EviKey – Hardware Security vs. Software Security
Managing SSH keys effectively requires solutions that balance usability and robust security. While software-based systems, such as centralized secrets management platforms, offer scalability, they frequently introduce vulnerabilities, including dependency on external servers and potential data breaches. In contrast, hardware-based security, such as EviKey NFC USB, ensures unmatched protection by operating entirely offline. This approach eliminates reliance on external infrastructure, making it ideal for safeguarding sensitive credentials. Watch the demo.
Advantages of Hardware-Based Security
EviKey NFC USB actively protects SSH keys by combining advanced hardware encryption and robust physical security measures:
- Offline Encryption: EviKey entirely removes online risks by keeping SSH keys offline. This design ensures complete protection against network-based attacks and unauthorized access.
- AES-256 CBC Encryption via PassCypher: Leveraging PassCypher, EviKey encrypts SSH keys using AES-256 CBC encryption, paired with a secure password. This ensures that even if the device is compromised, keys remain inaccessible without proper authentication.
- Tamper-Proof Design: Encased in military-grade resin, EviKey resists tampering and functions reliably in extreme environments, securing sensitive credentials at all times.
Risks of Software-Based Solutions
Despite their convenience, software-based systems face several limitations:
- Secret Sprawl Risks: Centralized secrets management systems often create duplicated credentials across multiple servers or systems. This redundancy increases the chances of exposure to malicious actors.
- Online Dependency: These platforms depend on cloud or server availability, making them susceptible to outages, breaches, and other external vulnerabilities.
- Shared Responsibility Challenges: In multi-user environments, enforcing strict security policies is often difficult, leaving gaps that malicious actors can exploit.
- Limited Encryption Practices: Many software solutions lack robust encryption, leaving SSH keys vulnerable to brute force attacks or phishing schemes.
Hybrid Approach for Enhanced Security
While centralized solutions are valuable for managing large-scale operations, EviKey NFC USB excels at protecting critical assets like sensitive SSH keys. By adopting a hybrid approach, organizations can pair centralized systems for scalability with EviKey’s offline storage to isolate and secure high-value secrets.
How EviKey Solves Secret Sprawl Challenges
Secret sprawl, a pervasive issue in many organizations, occurs when credentials proliferate across systems without proper oversight, creating unnecessary risks. EviKey directly addresses these risks by combining secure offline storage, granular access control, and robust traceability mechanisms.
- Encrypted SSH Keys with PassCypher: EviKey uses AES-256 CBC encryption to protect SSH keys, requiring users to enter a secure password before accessing them. This added encryption ensures even unlocked devices cannot expose sensitive keys without proper credentials.
- Centralized Offline Storage: EviKey consolidates SSH keys onto a single, tamper-resistant device. This reduces unnecessary copies and mitigates the risks of secret duplication or unauthorized sharing.
- Controlled Access: Only authorized users with NFC-enabled devices and their unique PINs can unlock EviKey. This ensures credentials remain secure even if the device is lost or stolen.
- Event Traceability with the Black Box: EviKey’s black box feature monitors device usage and logs random security events such as failed authentication attempts. Notably, the black box tracks device interactions, not the data stored on the USB flash memory. Once unlocked, EviKey functions seamlessly as a standard USB drive for usability.
This holistic approach effectively mitigates secret sprawl risks by isolating critical SSH keys in a secure, standalone device. Furthermore, EviKey’s offline design ensures that even in the absence of internet connectivity, your credentials remain fully protected. Combined with centralized solutions, this strategy provides both scalability and unparalleled security for high-value secrets.
How EviKey NFC Revolutionizes Secure SSH Key Storage
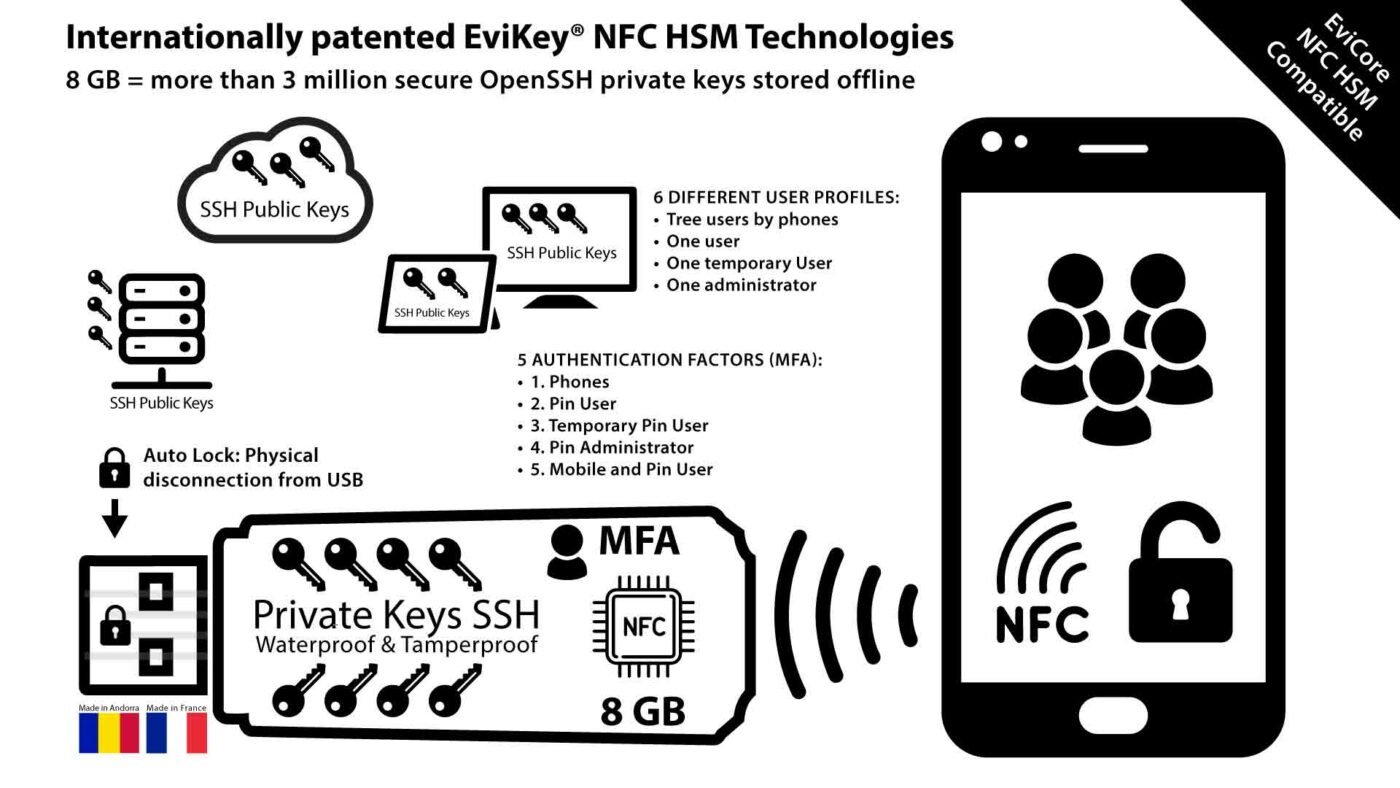
The EviKey NFC USB drive offers a hardware-based solution that externalizes SSH key storage. It secures private keys in a tamper-resistant device that can only be unlocked using contactless NFC authentication.
Key Features of EviKey NFC
Although centralized secrets management systems help organizations eliminate secret sprawl and automate key rotation, they still depend on external infrastructure. EviKey NFC USB complements these systems by providing NFC hardware-based security for critical credentials. It ensures your SSH keys are physically secure and invulnerable to network-based threats.
- Contactless Authentication: Securely unlock your SSH key using contactless NFC technology, ensuring safe and seamless SSH key storage.
- Encrypted SSH Keys with PassCypher: SSH keys stored on EviKey are encrypted using AES-256 CBC, requiring a secure password for access. This provides an extra layer of protection, ensuring credentials remain inaccessible even if the device is unlocked.
- Multi-Factor Authentication (MFA): Combines an admin or user PIN, NFC phone UID, and a unique pairing key.
- Advanced Security: Includes brute force detection with exponential delays after failed attempts.
- Physical Robustness: Military-grade resin ensures resistance to tampering and environmental damage.
- Undetectability When Locked: Notably, EviKey becomes invisible to systems when secured, preventing unauthorized detection. Explore how EviKey ensures compliance with cybersecurity standards.
For organizations managing a mix of centralized and offline credentials, EviKey offers a hybrid approach that strengthens overall security while minimizing vulnerabilities.
Backup and Recovery: Safeguarding Access
EviKey simplifies the backup and restoration of SSH keys:
- Backup Creation: Use the associated mobile app to export encrypted backups of your private key.
- Secure Recovery: Restore keys to a new device using NFC authentication and your unique pairing key.
For a deeper understanding of how EviKey NFC HSM protects your data and credentials, explore the complete guide to securing your data with EviKey NFC HSM.
Moreover, this ensures business continuity even if the device is lost or damaged, without compromising security.
Real-World Use Cases for EviKey:
- Critical Infrastructure: Protect SSH keys for industrial systems that require offline, tamper-proof security.
- Financial Institutions: Safeguard sensitive credentials against insider threats and brute force attacks.
- Remote Work Environments: Ensure SSH keys remain isolated and secure, even when used on untrusted devices.
Proven Benefits:
- Mitigates risks associated with secret sprawl by offering standalone, secure storage.
- Provides a robust alternative to traditional centralized secrets management systems.
- Enhances compliance with regulations like ISO 27001 and GDPR by offering GDPR-compliant SSH storage, ensuring personal data is handled with the utmost security.
Black Box Monitoring: Unmatched Traceability
The integrated black box feature tracks critical events like failed authentication attempts, brute force detections, and system interactions. This data is invaluable for:
- Audits: Ensuring compliance with regulatory standards.
- Incident Response: Quickly identifying and mitigating threats.
- Operational Insights: Monitoring device usage for security optimization.
Compliance with SL4 Industrial Standards
The EviKey NFC HSM ensures secure SSH key storage and complies with SL4 (Security Level 4) standards under IEC 62443-3-3. This ensures:
- Advanced Threat Resistance: Protection against physical, invasive, and non-invasive attacks.
- Operational Integrity: Guaranteed performance under industrial-grade requirements.
Compliance reassures users of its reliability in high-stakes environments.
Energy Efficiency Through NFC Power Harvesting
A standout feature of EviKey is its NFC signal energy harvesting. This innovation:
- Eliminates dependency on external power sources.
- Enables lightweight and portable design.
- Provides long-term durability, with data persistence for up to 40 years without external power.
This energy efficiency sets EviKey apart in the secure storage landscape.
When to use a hardware versus software solution?
Choosing between a hardware-based solution like EviKey and a software-based solution depends on your security needs:
- Opt for a software-based solution if you need centralized secrets management for team collaboration or automation across distributed systems.
- Choose EviKey for critical infrastructures, industries requiring compliance with strict regulations, or for protecting highly sensitive credentials in offline environments.
Combine both approaches for comprehensive protection, using EviKey for your most critical SSH keys and software solutions for broader operational management. Download the Fullkey app to manage your EviKey securely: Fullkey on Google Play.
How to Store and Use Your SSH Keys with EviKey NFC USB Drives for Secure SSH Key Storage
1. Generate Your SSH Key Pair
OpenSSH (Linux/macOS/Windows)
- On Linux or macOS, use the OpenSSH client:
- For stronger security, consider generating ED25519 keys:
- On Windows, ensure OpenSSH is installed or use Windows Subsystem for Linux (WSL):
PuTTYgen (Windows GUI)
- Download and launch PuTTYgen.
- Select RSA (4096-bit) or ED25519 for better security.
- Click Generate and follow the prompts.
- Save the private key () and convert it to OpenSSH format for compatibility:
id_rsa
- In PuTTYgen, go to Conversions > Export OpenSSH Key.
- Transfer the converted private key to EviKey:
Git for Windows (With PassCypher HSM PGP)
- Install Git for Windows and open Git Bash.
- Generate the SSH key:
- Transfer the private key to EviKey for secure storage:
GitHub CLI
- Install the GitHub CLI.
- Generate a key and save it:
- Transfer the private key to EviKey:
2. Store Your Private Key on EviKey
After generating the SSH key, store it on your EviKey NFC USB drive to ensure secure storage:
- On Linux/macOS:
- On Windows, copy the key using File Explorer or the command prompt:
3. Lock and Unlock with NFC
Use EviKey’s dedicated Android app for NFC-based secure operations:
- Lock: Approach your NFC-enabled phone to lock the device securely.
- Unlock: Unlock it only when needed for SSH authentication.
- The programmable auto-lock ensures the device secures itself after use.
Using EviKey for SSH Authentication
Local Authentication
Authenticate securely on your local machine:
Remote Server Authentication
Access remote servers seamlessly:
Each session ensures that your private key remains externalized, protected by EviKey’s advanced security mechanisms.
Expanded Use Cases for SSH Key Generation and Storage
For Developers Using WSL (Windows Subsystem for Linux)
- Open WSL and use OpenSSH to generate SSH keys:
- Copy the private key to the EviKey USB device via WSL:
For Teams with Centralized Systems
If you are integrating with centralized secrets management:
- Use EviKey for your most sensitive keys while maintaining less critical keys in your centralized system.
- Rotate and back up keys easily using EviKey’s NFC app.
Why Expand on Key Generation Methods?
Adding these methods makes your guide accessible to a wider audience, offering options for GUI-based and CLI-based workflows. Highlighting compatibility with tools like Git for Windows and PuTTYgen ensures users across various platforms can seamlessly integrate EviKey into their workflow.
Programmable Auto-Lock: Intelligent Physical Isolation
The EviKey NFC HSM USB drive stands out by offering a unique programmable auto-lock feature. This functionality ensures that the device automatically locks itself after being used for an SSH connection. Once the session ends, the key physically isolates itself from the host system, providing an additional security layer.
This automatic isolation prevents unauthorized access even if the device remains connected to the system. Combined with its contactless unlocking mechanism, the EviKey creates a virtually impenetrable barrier against cyber threats.
Key Benefits of Auto-Lock:
- Immediate prevention of unauthorized access after usage.
- Enhanced protection for prolonged or unattended sessions.
- Tailored for high-security environments like critical infrastructures or financial systems.
Advanced Multi-Layer Security with PassCypher
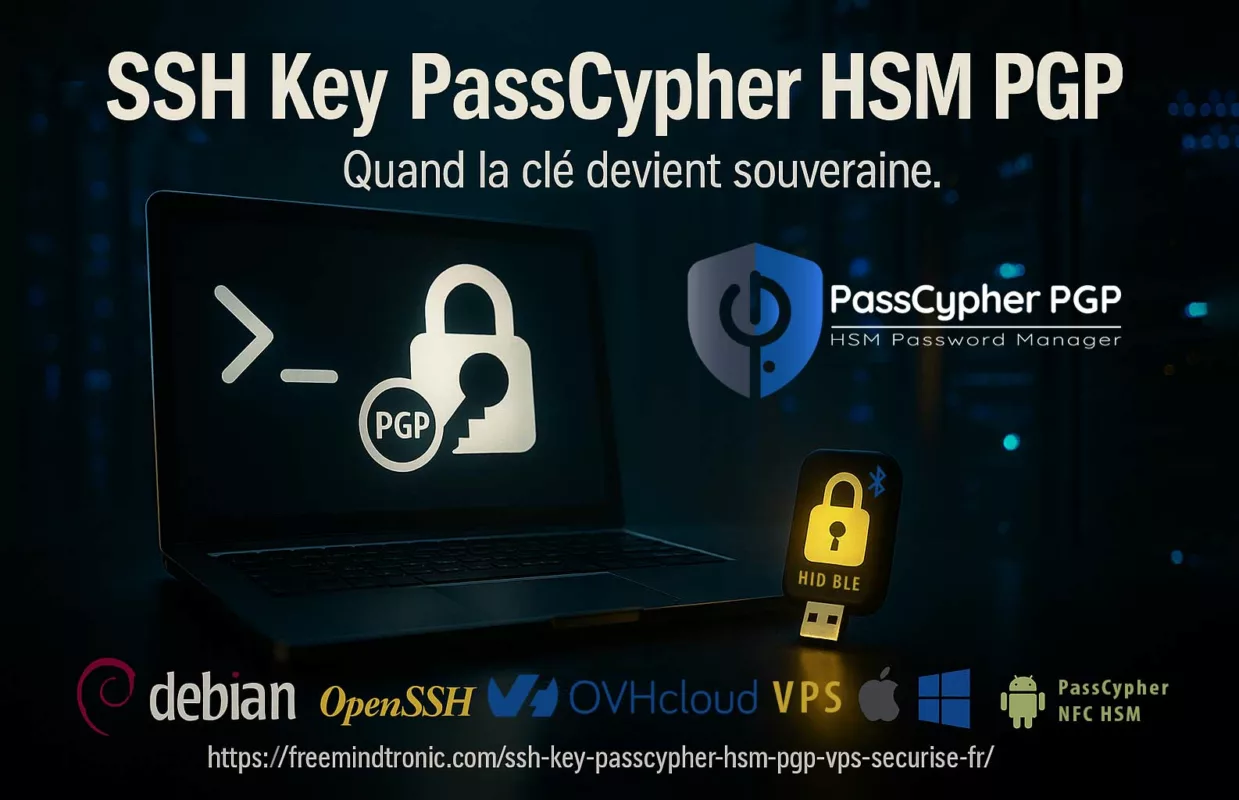
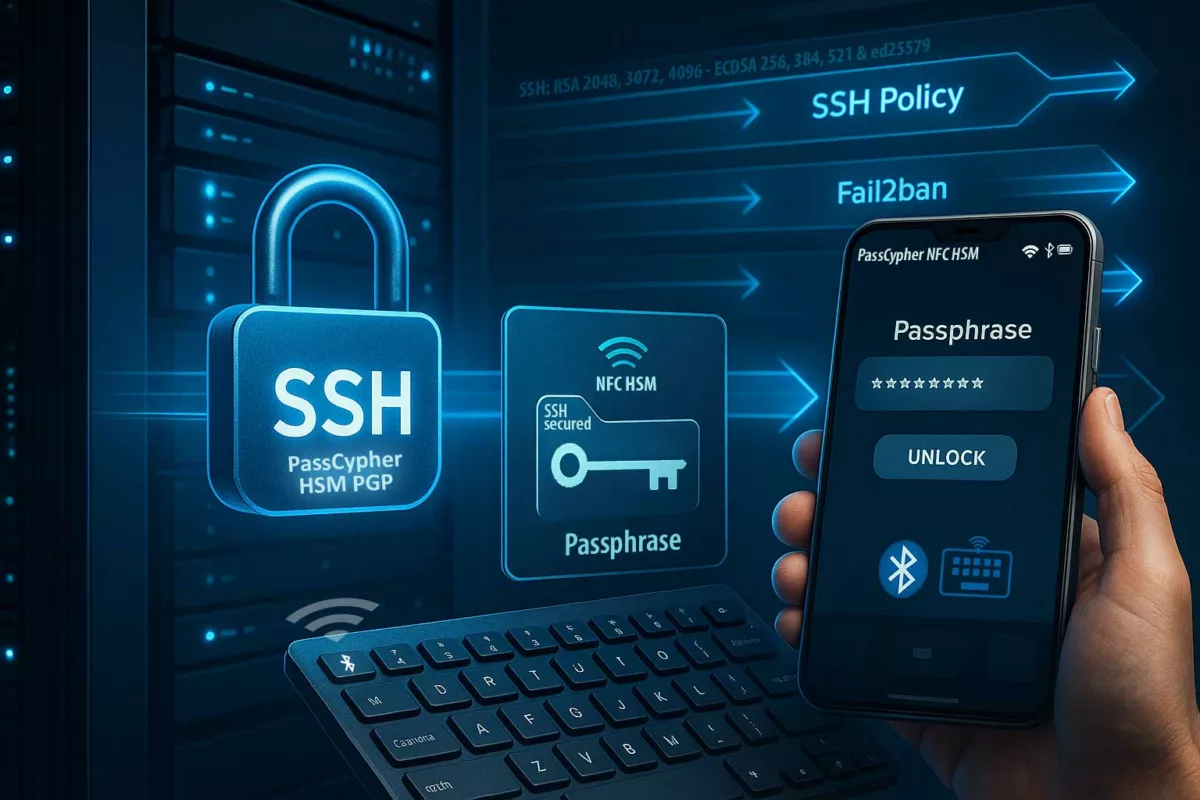
EviKey pairs its auto-lock feature with PassCypher HSM PGP, an additional tool for securing SSH keys. With PassCypher, you can assign a password to your private SSH key, adding an extra protection layer. This means that even if someone gains physical access to the device, it remains useless without the correct password.
How PassCypher Strengthens Security:
- Password Protection: Ensures the SSH key remains unusable without proper authentication.
- Enhanced Encryption: Keeps private keys securely encrypted at all times.
- User-Friendly Management: Provides an intuitive way to set up and manage passwords and private keys.
- AES-256 CBC Encryption: Each SSH key stored on EviKey is encrypted using industry-standard AES-256 CBC encryption. Users must input the associated password to decrypt and utilize the keys, safeguarding against unauthorized access.
- Enhanced Physical Security: Even with physical access, attackers cannot use the encrypted keys without the correct PIN and password, ensuring dual-layer security.
Comparison: EviKey vs Competitors
EviKey’s unique features surpass competitors like Nitrokey, YubiKey, and OnlyKey:
- Contactless NFC Authentication: Exclusive to EviKey.
- Physical Undetectability: Invisible when locked.
- Black Box Monitoring: Comprehensive event tracking for unmatched traceability.
- Military-Grade Protection: Superior robustness and durability.
- AES-256 CBC with Password: Highlight EviKey’s ability to encrypt each SSH key individually using a user-defined password for unparalleled protection.
At a Glance: EviKey NFC HSM vs. the Competition
| Criteria |
EviKey NFC with PassCypher HSM PGP |
Nitrokey HSM 2 |
YubiKey |
OnlyKey |
| Memory |
Not applicable (external storage: 8GB-128GB) |
76 KB EEPROM |
32 KB |
32 KB |
| SSH Key Capacity |
Over 4 billion |
Up to 19 RSA-4096 keys |
Up to 25 resident keys |
Up to 24 unique offline accounts |
| Password Protection per Key |
Yes (each SSH key is secured by an additional password) |
No |
No |
No |
| Supported Algorithms |
RSA (2048, 3072, 4096), ECDSA (256, 384, 521), ED25519 |
RSA (1024, 2048, 3072, 4096), ECC (P-256, P-384, P-521), AES-256 |
RSA (2048, 3072, 4096), ECC (P-256, P-384) |
RSA (2048, 3072, 4096), ECC (P-256, P-384, P-521) |
| Contactless Authentication |
Yes, via NFC contactless authentication for secure SSH key storage |
No |
Yes, NFC or USB |
Yes, NFC or USB |
| Users for Contactless SSH & OpenSSH Unlocking |
Up to 6 users |
None |
1 user |
1 user |
| 2FA / MFA Authentication Modes |
MFA: Android NFC-secured phone + Unique pairing key + Admin or User PIN (permanent or temporary) and/or NFC phone UID. Combined elements ensure multi-factor physical security. |
2FA via PIN |
2FA via PIN |
2FA via PIN |
| Protection Against Brute Force Attacks |
Electronic brute force attack protection: Moreover, the auto-unpairing system includes a default limit of 3 attempts, programmable up to 13 attempts with exponential delays before permanent lock, ensuring unmatched secure SSH key storage. |
No |
No |
No |
| Detectability in Locked Mode |
Undetectable: EviKey is physically undetectable when locked. |
Nitrokey detectable |
YubiKey detectable. |
OnlyKey detectable. |
| Physical Security of the Device |
Advanced brute force protection: attack detection, exponential unpairing, physically undetectable when locked. |
Standard with PIN lock |
Standard with PIN lock |
Standard with PIN lock |
| Patents |
3 international patents |
None |
None |
None |
| Electrical Protection |
Integrated with intelligent regulator |
No |
No |
No |
| Thermal Safeguards |
Functional & thermal sensors with breaker |
No |
No |
No |
| ESD Protection |
27kV on data channel |
No |
No |
No |
| Physical Robustness |
Military-grade resin; Waterproof & Tamperproof |
No |
No |
No |
| Security from Attacks |
Inclusive of invasive & non-invasive threats |
No |
No |
No |
| Authentication Attempt Limit |
13 (modifiable by admin) |
No |
No |
No |
| USB Port Protection |
Fully independent security system |
No |
No |
No |
| Contactless Security Energy |
Harvests energy from NFC signals |
No |
No |
No |
| Black Box Monitoring |
Comprehensive event tracking |
No |
No |
No |
| Fault Detection |
In-built self-diagnostics |
No |
No |
No |
| Memory Write Count |
Monitors flash memory health |
No |
No |
No |
| Data Persistence |
40 years without external power |
No |
No |
No |
| Temperature Guard |
Ensures optimal performance |
No |
No |
No |
| Auto-lock Duration |
Admin-defined (seconds to minutes) |
No |
No |
No |
Best Practices for SSH Key Management with Hardware Solutions and Comprehensive Security
The EviKey NFC HSM USB drive delivers state-of-the-art protection for SSH key storage, but ensuring complete system security requires a proactive approach. By implementing the following best practices, you can significantly reduce vulnerabilities and fortify your digital ecosystem:
-
Maintain Software and Firmware Updates
Cybercriminals frequently exploit vulnerabilities in outdated software. Regularly update your operating systems, USB drivers, and firmware to close potential security gaps. Automate updates where possible to minimize human oversight and ensure timely patching.
-
Adopt Multi-Factor Authentication (MFA)
For systems requiring USB-based access, enable MFA to add an additional layer of protection. Pair methods like NFC authentication with PINs, biometrics, or time-sensitive codes to enhance security and prevent unauthorized access.
-
Change Default Ports and Protocols
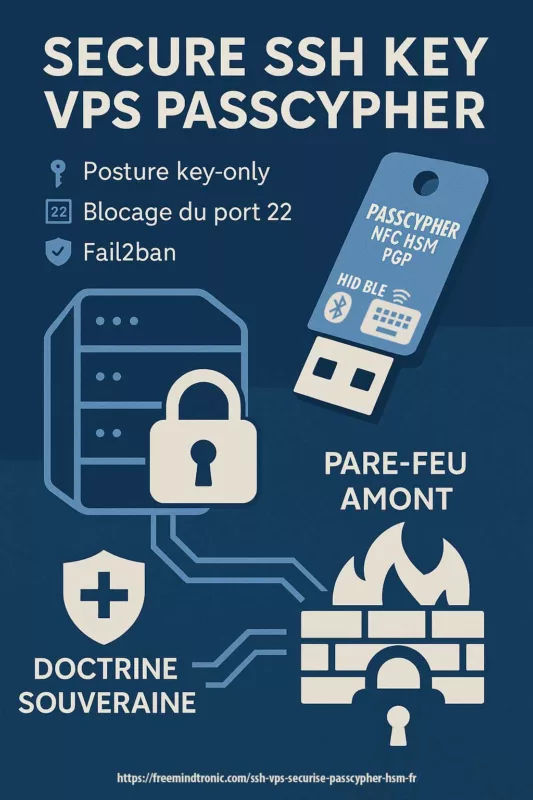
Default configurations, such as using port 22 for SSH, are prime targets for attackers. Change these settings to non-standard ports and disable unused protocols. Consider adopting encrypted alternatives like SFTP over plain FTP to secure data transfers.
-
Implement Inactivity Timeouts
Set timeouts for idle sessions involving USB devices to log out users automatically, taking advantage of programmable auto-lock for secure SSH key storage. This limits the exposure window in case the device is left unattended or forgotten. Customize session lengths based on the sensitivity of the tasks being performed.
-
Strengthen Authentication Practices
Replace password-based systems with cryptographic methods, such as SSH keys secured by robust passphrases. Leverage EviKey’s NFC-enabled security to externalize sensitive keys and reduce exposure on local machines.
- Restrict and Monitor Login Attempts
Implement a strict limit on failed login attempts to mitigate brute force attacks. For added resilience, introduce exponential backoff delays between retries. Tools like Fail2Ban can automate blocking after repeated unauthorized access attempts.
-
Disable Root Login Over SSH
Eliminate the use of root credentials for SSH access. Instead, enforce the principle of least privilege by creating restricted user accounts with limited access rights. Elevate privileges only when absolutely necessary using
-
Enable Comprehensive Logging and Alerts
Configure detailed logging for all USB-related and system activities, including authentication attempts and configuration changes. Use Security Information and Event Management (SIEM) tools to analyze logs and set up alerts for suspicious behaviors, enabling swift responses to potential threats.
-
Minimize Attack Surface by Disabling Unused Features
Deactivate services and features not actively in use, such as X11 Forwarding, USB debugging, or legacy protocols. Unused features often serve as entry points for attackers, so proactively removing them strengthens system security.
-
Conduct Regular Security Audits and Penetration Tests
Schedule regular vulnerability assessments for your USB devices, operating systems, and connected systems. Employ penetration testing to simulate real-world attacks, uncover hidden weaknesses, and validate your defenses.
-
Secure Data in Transit and at Rest
Encrypt all sensitive data using strong algorithms, whether it is being transmitted over networks or stored on NFC USB drives for secure SSH key storage. The EviKey NFC HSM USB drive already provides industrial-grade encryption, but ensure this principle extends to all aspects of your system.
-
Leverage Network Segmentation
If USB devices access critical systems, isolate those systems on segmented networks. This limits lateral movement in the event of a breach and ensures that sensitive assets remain compartmentalized.
-
Establish Incident Response Protocols
Develop and regularly update incident response plans to address potential breaches. This includes steps to secure USB devices, contain affected systems, and restore operations while preserving forensic evidence for investigations.
-
Use Tamper-Evident Measures
Physically secure USB devices with tamper-evident seals or locks. Combine these measures with periodic visual inspections to detect unauthorized attempts to access or modify the device.
By combining these best practices with the advanced security features of the EviKey NFC HSM USB drive, you demonstrate the value of hardware-based solutions for SSH key management. This approach not only protects your SSH keys but also fortifies your entire digital infrastructure against a broad range of cyber threats. Adopting such comprehensive measures is essential for staying ahead in the ever-evolving landscape of cybersecurity.
Automated Best Practices for Security
The combination of programmable auto-lock and PassCypher automates critical security best practices. This automation eliminates the risk of human error, ensuring that your SSH keys and sensitive data remain secure. By adopting EviKey’s technology, you integrate a seamless yet comprehensive approach to system protection.
Real-World Use Cases:
- Server Administration: After completing an SSH session, the EviKey locks itself, preventing further access.
- Remote Work Security: Professionals working from unfamiliar systems can trust that their private keys remain isolated.
- Regulatory Compliance: EviKey’s built-in security measures help organizations meet compliance standards, such as ISO 27001 and GDPR.
Secure Your Digital World with EviKey
Protecting your SSH keys is more than just a technical task; in fact, it is a cornerstone of digital security. Moreover, the advanced features of the EviKey NFC USB drive not only empower you with robust protection but also provide unmatched flexibility and unparalleled ease of use. Whether you are managing sensitive data, securing remote access, or meeting compliance standards, EviKey consistently delivers the cutting-edge tools you need to stay ahead of evolving cyber threats.
Secure Your Digital Ecosystem
The EviKey NFC HSM USB drive is far more than a storage device; rather, it serves as a gateway to enhanced digital security. By combining offline security solutions with advanced encryption, it ensures robust protection against secret sprawl while offering GDPR-compliant SSH storage. Whether you are safeguarding SSH keys, managing sensitive credentials, or complying with strict regulations, EviKey consistently delivers unparalleled performance, ensuring your digital ecosystem remains secure and resilient.
Upgrade to EviKey NFC USB for unparalleled secure SSH key storage and advanced cybersecurity solutions. Explore our product range:
Take the next step in protecting your digital assets with EviKey.
